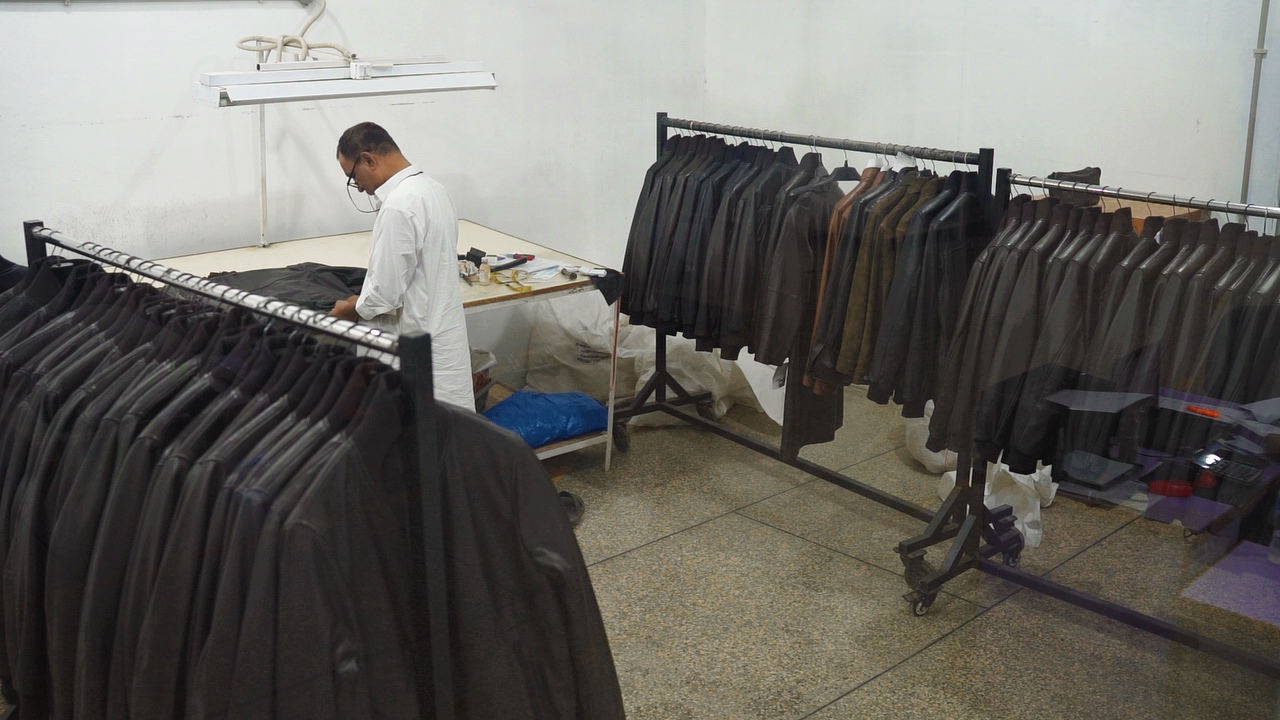
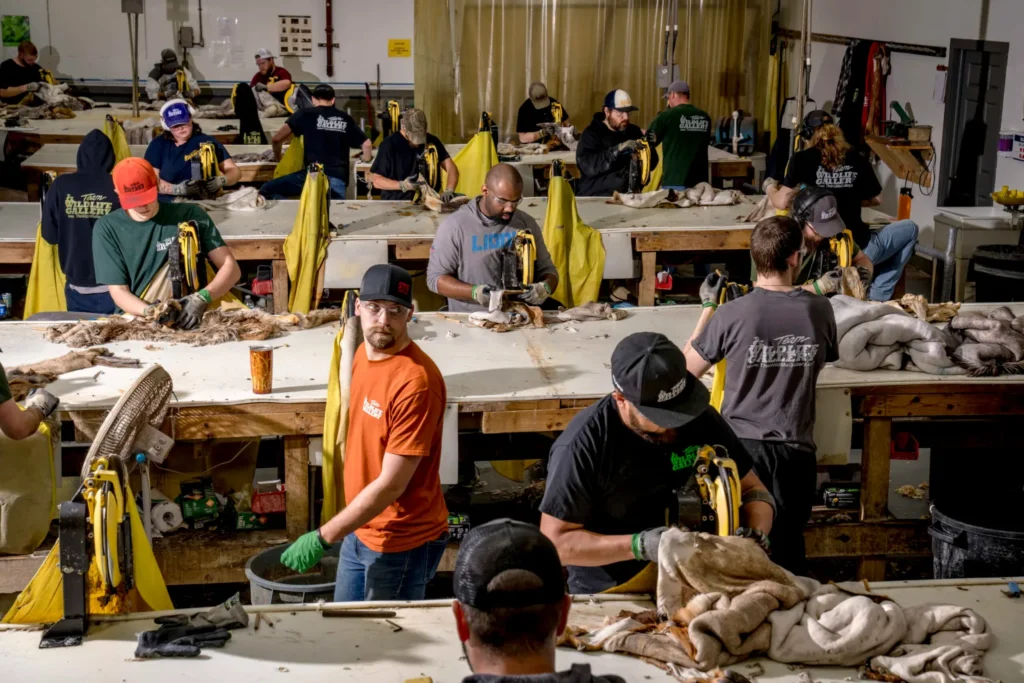
Black leather jackets are manufactured through a detailed process that combines leather selection, tanning, dyeing, pattern development, cutting, stitching, finishing and quality control.
Although the completed jacket may appear simple, its production requires careful coordination between tanneries, designers, pattern makers, cutters, machine operators and quality-control teams. Every decision—from the animal hide and leather thickness to the stitching thread and zip quality—affects the jacket’s appearance, comfort and durability.
This guide explains how black leather jackets are manufactured, from raw hide selection to final packaging, while highlighting the quality standards important to fashion brands, wholesalers and retailers.
Black Leather Jacket Manufacturing Process at a Glance
The main manufacturing stages include:
- Selecting the animal hide
- Preserving and preparing the raw hide
- Tanning the leather
- Dyeing it black
- Applying the required surface finish
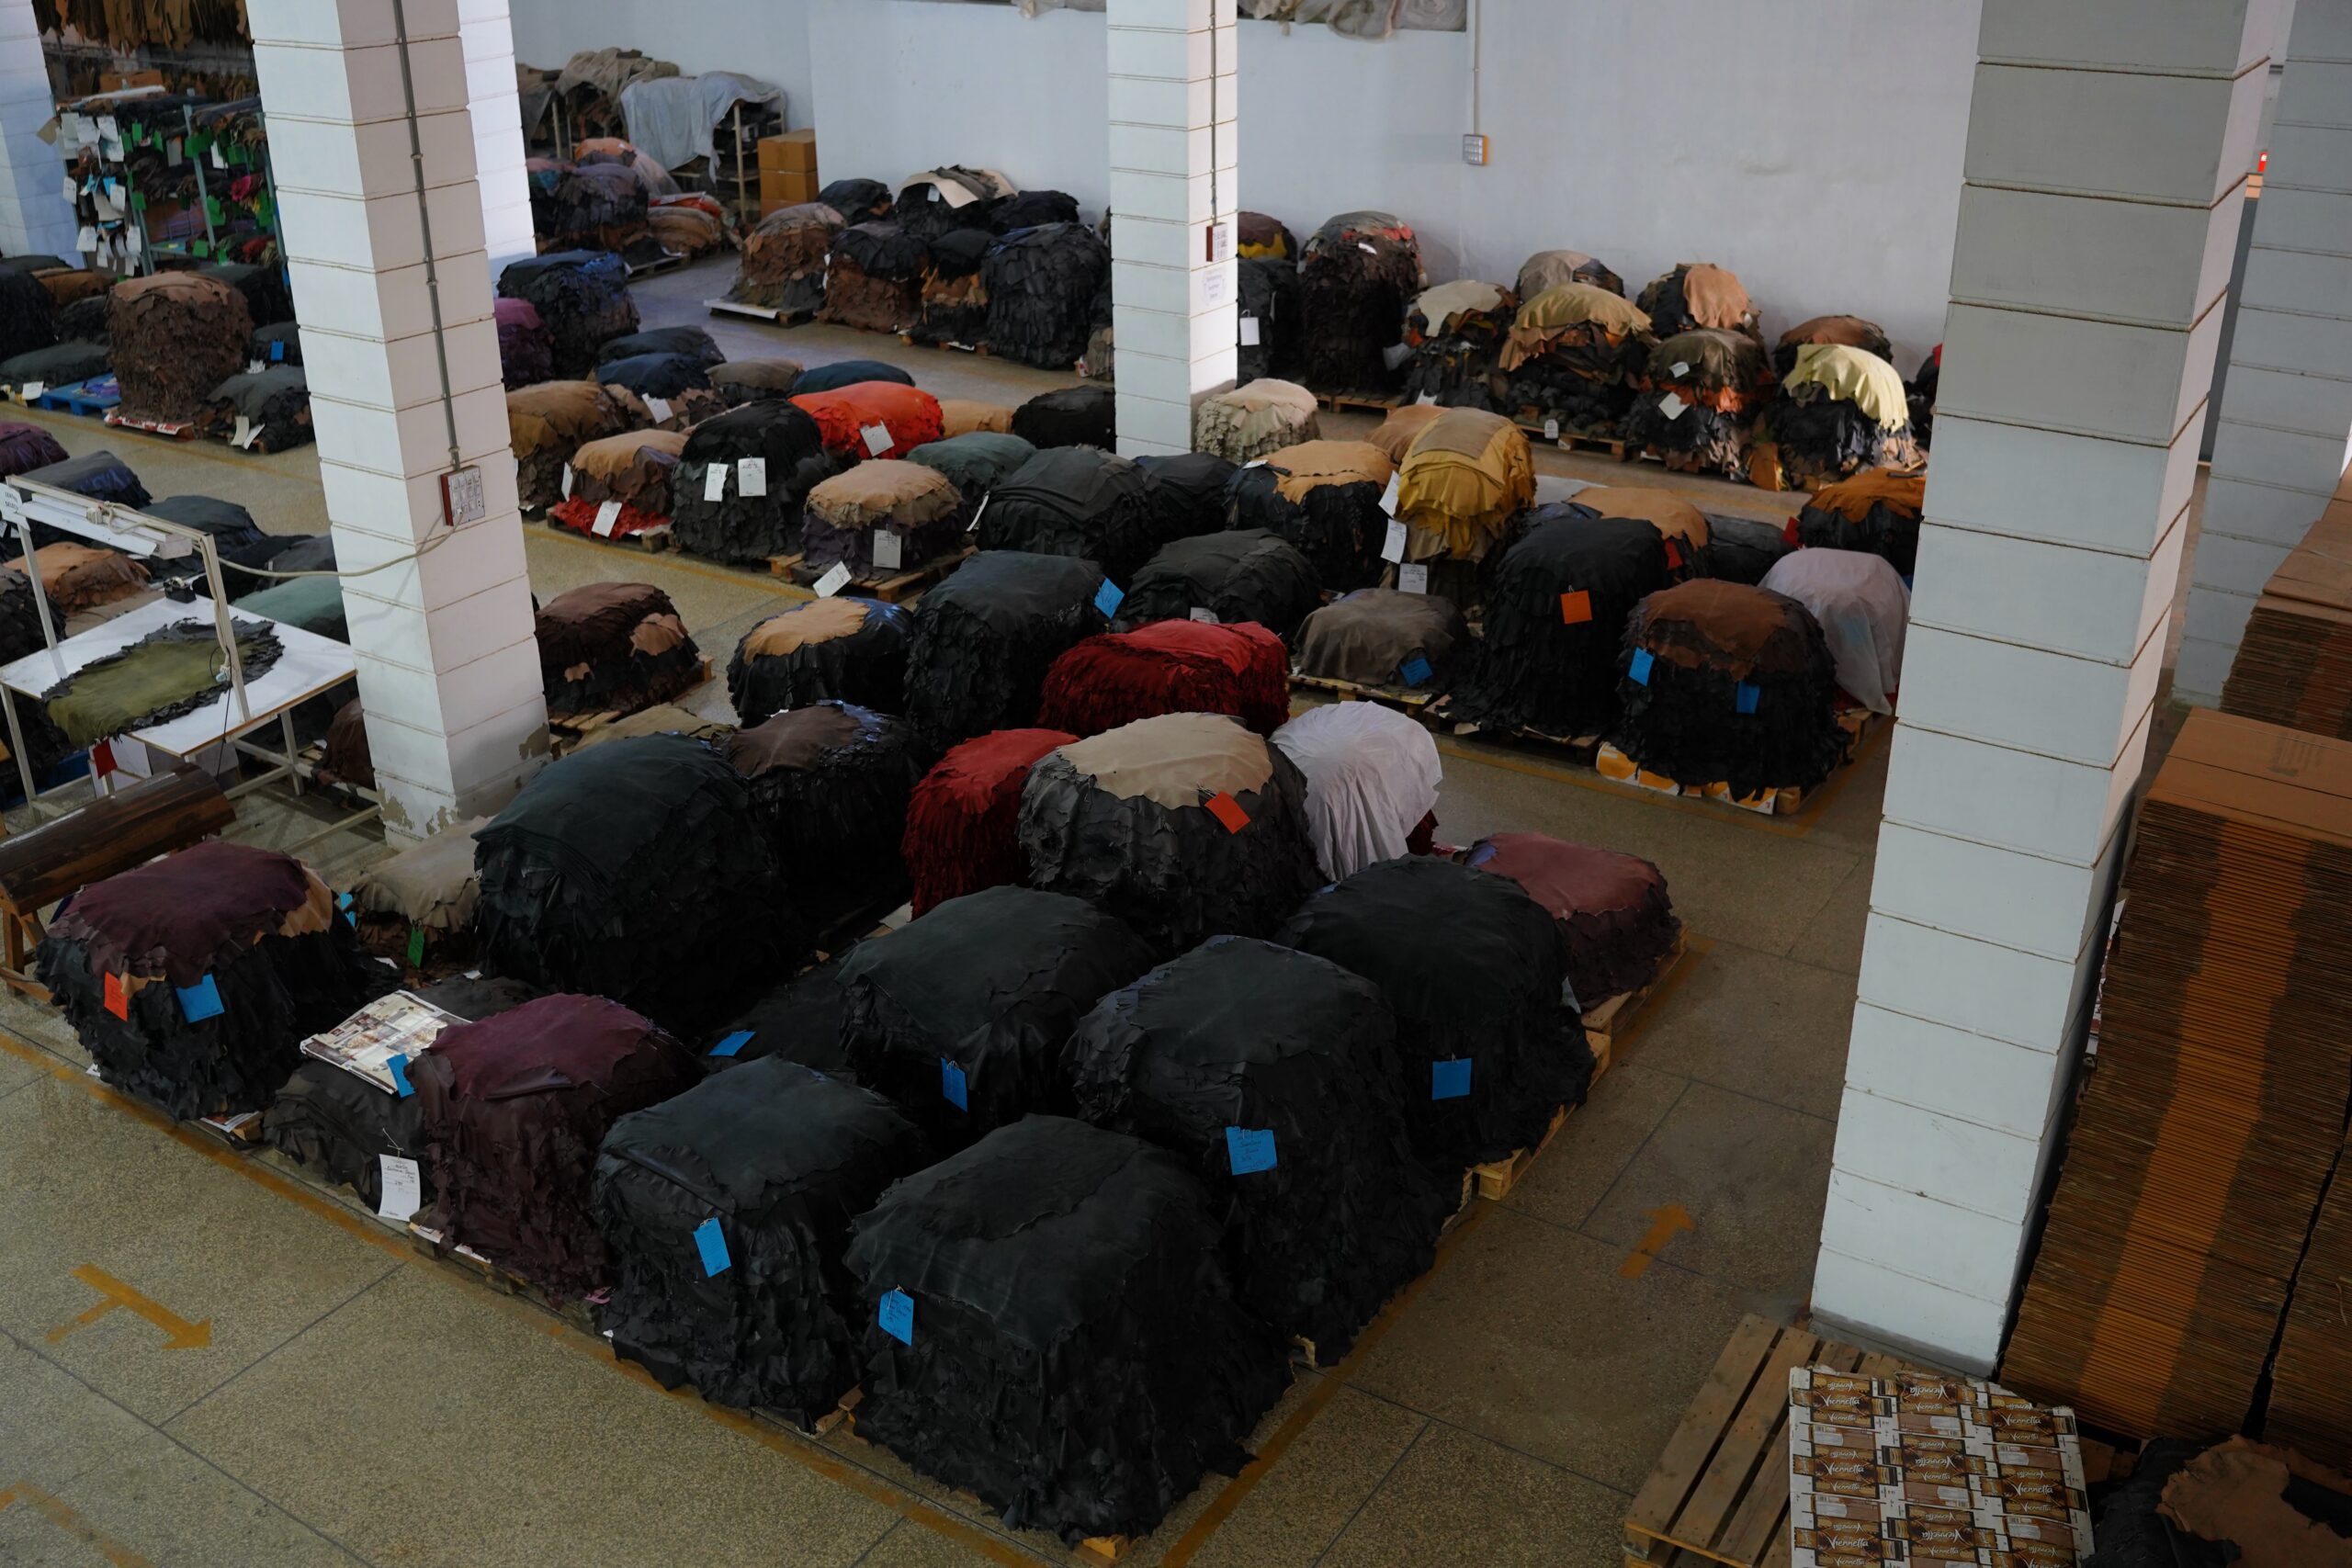
- Grading and matching the leather
- Developing the jacket pattern
- Producing and approving samples
- Cutting the leather panels
- Preparing the lining and components
- Stitching the jacket
- Installing zips and hardware
- Finishing the garment
- Conducting quality inspections
- Pressing, packing and shipping
Each stage must be controlled carefully because defects in leather manufacturing are often difficult or expensive to correct later.
Step 1: Selecting the Right Animal Hide
The manufacturing process begins with selecting the type of leather suitable for the jacket’s design, price and intended use.
Common options include:
- Cowhide
- Sheepskin
- Lambskin
- Goatskin
- Buffalo leather
- Calfskin
Cowhide
Cowhide is strong, structured and durable. It is frequently used for biker jackets, café racers, bombers and rugged outerwear.
Sheepskin
Sheepskin is softer, lighter and more flexible. It works well for fitted jackets, fashion garments and lightweight collections.
Lambskin
Lambskin provides a smooth, soft and luxurious touch. It is commonly selected for premium fashion jackets but generally requires more careful handling.
Goatskin
Goatskin offers good strength without excessive weight. Its distinctive grain makes it suitable for bomber, flight and casual leather jackets.
Buffalo Leather
Buffalo leather usually has a bold grain and substantial structure. It is often used for vintage, distressed and heritage-inspired products.
Calfskin
Calfskin provides a fine grain and refined appearance. It is suitable for luxury jackets requiring a balance between softness and durability.
The best material depends on the required weight, structure, flexibility, grain, finish and target retail price.
Step 2: Preserving the Raw Hides
Fresh animal hides contain moisture and organic material, so they must be preserved quickly to prevent decomposition.
Common preservation methods include:
- Salting
- Brining
- Chilling
- Controlled drying
Salt removes moisture and reduces bacterial growth while the hides are transported to the tannery.
When the hides arrive, they are inspected and sorted according to:
- Animal type
- Size
- Weight
- Thickness
- Visible damage
- Surface condition
- Expected quality grade
Hides with severe cuts, holes or extensive damage may be unsuitable for large visible jacket panels.
Step 3: Soaking and Cleaning
Preserved hides must be cleaned before tanning.
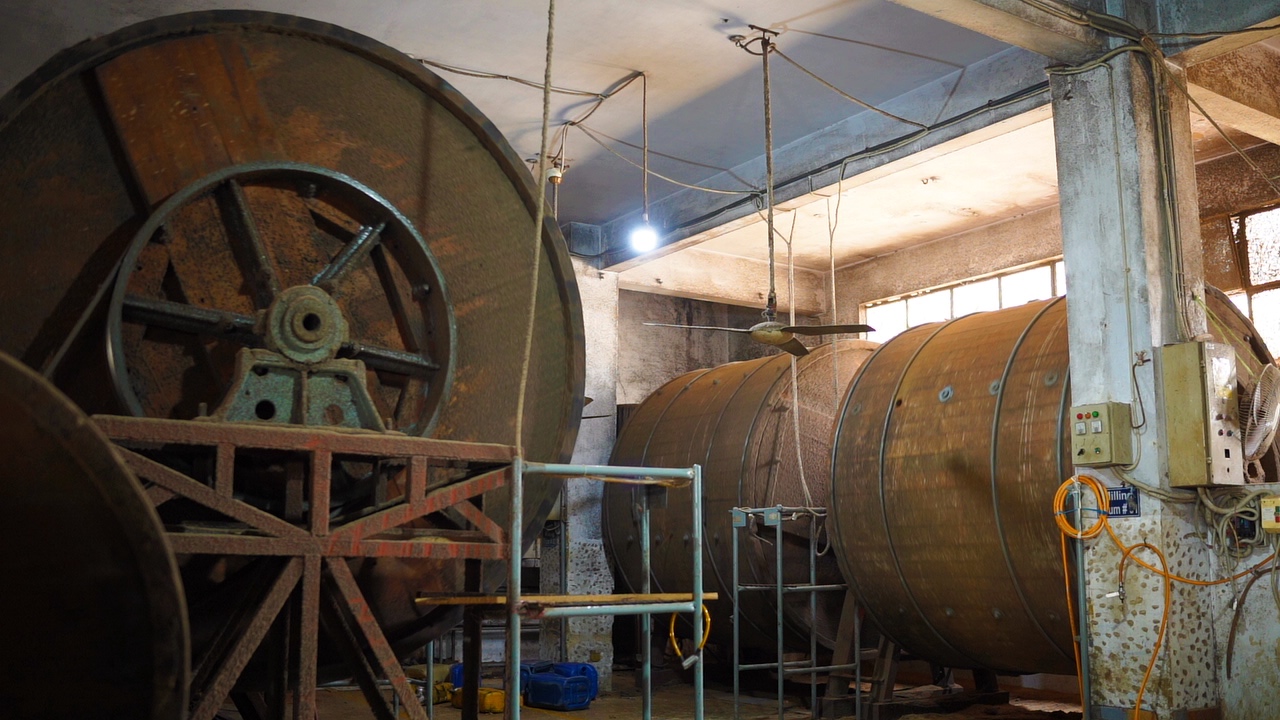
They are placed in large rotating drums containing water and controlled chemicals. Soaking removes salt, dirt, blood and other unwanted materials while restoring moisture lost during preservation.
The tannery carefully controls:
- Water temperature
- Drum speed
- Soaking time
- Chemical concentration
- pH level
Improper soaking can cause uneven processing later, affecting softness, colour and surface quality.
Step 4: Liming and Dehairing
During liming, hides are treated to remove hair and unwanted proteins.
This stage helps:
- Loosen hair follicles
- Remove natural grease
- Open the fibre structure
- Prepare the hide for tanning
- Improve chemical penetration
After liming, machinery removes the loosened hair and remaining tissue.
The fleshing process cleans the inner side of the hide by removing fat, flesh and connective tissue. Careful machine adjustment is essential because excessive pressure may cut or weaken the leather.
Step 5: Splitting the Hide
Thick hides may be split horizontally into separate layers.
The upper layer contains the natural grain and may be used to produce:
- Full-grain leather
- Top-grain leather
- Corrected-grain leather
The lower layer is called split leather. It may be finished or coated for use in lower-priced garments and other leather products.
Splitting helps manufacturers control thickness and use different sections of the hide efficiently.
For jackets, leather thickness must match the design. A lightweight fashion jacket requires different material from a structured motorcycle-inspired jacket.
Step 6: Deliming, Bating and Pickling
After liming, the hide’s alkalinity must be reduced.
Deliming
Deliming removes residual lime and gradually lowers the pH.
Bating
Bating uses enzymes to clean and soften the fibre structure. It contributes to a smoother surface and more flexible leather.
Pickling
During pickling, hides are treated with salt and acid to prepare them for certain tanning methods, particularly chrome tanning.
Precise chemical control is important because uneven treatment can lead to poor tanning penetration or inconsistent leather performance.
Step 7: Tanning the Leather
Tanning converts raw hide into stable leather that resists decomposition.
The main tanning methods used for jacket leather include:
Chrome Tanning
Chrome tanning is widely used for garment leather because it can produce:
- Softness
- Flexibility
- Heat resistance
- Colour consistency
- Efficient production
- Good physical performance
The leather produced after chrome tanning commonly has a pale blue-grey appearance and is sometimes called wet blue.
Vegetable Tanning
Vegetable tanning uses tannins obtained from plant sources. It can produce firm leather with strong natural character and excellent ageing potential.
However, vegetable-tanned leather is generally less common for soft fashion jackets because it may feel firmer and require longer processing.
Chrome-Free and Alternative Tanning
Some manufacturers use chrome-free or metal-free systems to meet particular brand requirements. These processes must be supported by clear technical specifications and testing.
The tanning method influences softness, colour absorption, durability, moisture response and environmental performance.
Step 8: Neutralisation and Retanning
After primary tanning, the leather undergoes additional processing to create the required jacket characteristics.
Neutralisation adjusts its acidity and prepares it for retanning, dyeing and fatliquoring.
Retanning may be used to improve:
- Fullness
- Softness
- Grain tightness
- Shape retention
- Dye uniformity
- Touch
- Water resistance
- Overall performance
The retanning formula depends on the animal source and final product.
A soft lambskin fashion jacket requires a different formulation from a firm full-grain cowhide biker jacket.
Step 9: Dyeing the Leather Black
Black leather is normally coloured in rotating drums so the dye can penetrate the fibre structure.
The tannery controls:
- Dye type
- Dye concentration
- Water temperature
- Drum time
- pH
- Penetration
- Shade consistency
Some leather is dyed through its complete cross-section, while other leather may receive strong surface pigmentation after drum dyeing.
The intended black shade should be approved using a physical colour standard. “Black” can include several appearances, such as:
- Deep neutral black
- Blue-black
- Warm black
- Jet black
- Vintage black
- Faded black
- Two-tone black
For bulk production, colour consistency is essential. Leather produced in different batches may show subtle shade differences, so hides should be grouped and matched before cutting.
Step 10: Fatliquoring
Fatliquoring introduces oils and lubricating materials into the leather fibres.
This stage helps create:
- Softness
- Flexibility
- Tear resistance
- Comfortable movement
- Reduced fibre friction
- Better long-term performance
Without appropriate lubrication, leather may feel dry, stiff or brittle.
The amount and type of fatliquor depend on the required result. Lambskin normally needs a soft and lightweight feel, while cowhide may require a firmer structure.
Step 11: Drying and Softening
After wet processing, the leather must be dried carefully.
Common drying methods include:
- Air drying
- Vacuum drying
- Toggle drying
- Hanging
- Controlled mechanical drying
Drying influences the leather’s area, texture, softness and final dimensions.
Once dry, the leather may feel firm and require mechanical softening. Staking machines flex and stretch the leather to produce the desired softness.
Some leather may also be:
- Tumbled in dry drums
- Buffed
- Ironed
- Plated
- Embossed
- Polished
These processes help create the required grain and surface feel.
Step 12: Applying the Surface Finish
The surface finish determines how the black leather looks and performs.
Common finishes include:
- Aniline
- Semi-aniline
- Pigmented
- Waxed
- Oiled
- Matte
- Semi-matte
- Glossy
- Distressed
- Vintage
- Two-tone
Aniline Finish
Aniline leather uses transparent dyes with minimal surface coating. It displays natural grain clearly but may be more sensitive to stains and moisture.
Semi-Aniline Finish
Semi-aniline leather receives a light protective finish while retaining much of its natural appearance.
Pigmented Finish
Pigmented leather uses colour coatings that provide greater uniformity, surface protection and resistance to everyday wear.
Waxed or Oiled Finish
Waxes and oils create depth, tonal variation and a heritage appearance. These finishes can develop character as the jacket is worn.
Full-grain leather is particularly valuable for premium jackets because it retains the hide’s natural surface and dense fibre structure. This guide explains why full-grain leather is ideal for premium black leather jackets.
Step 13: Testing the Finished Leather
Before the leather is approved for garment manufacturing, it may undergo physical and chemical testing.
Important tests can include:
- Leather thickness
- Tear strength
- Tensile strength
- Seam strength
- Flex resistance
- Finish adhesion
- Dry rubbing colourfastness
- Wet rubbing colourfastness
- Water spotting
- Lightfastness
- pH
- Restricted substances
- Chemical compliance
Testing requirements depend on the destination market, customer standards and jacket’s intended use.
A visually attractive leather may still perform poorly if its finish cracks, colour transfers or seams tear under pressure. Testing reduces these risks before bulk cutting begins.
Step 14: Grading the Leather
Finished hides are inspected and graded before jacket production.
Inspectors check for:
- Grain quality
- Black shade
- Thickness
- Softness
- Stretch
- Surface finish
- Natural marks
- Cuts
- Holes
- Scars
- Usable cutting area
Natural leather is not completely uniform. Skilled grading separates hides according to the quality and consistency required for different products.
Higher-quality visible jacket panels normally require cleaner and better-matched areas of the hide.
Step 15: Developing the Jacket Design
The garment manufacturing process begins with a design concept or technical package supplied by the buyer.
The design should clearly define:
- Jacket style
- Front and back appearance
- Collar shape
- Pocket placement
- Sleeve design
- Cuff construction
- Hardware
- Lining
- Labels
- Stitching details
- Measurements
- Fit requirements
- Finishing instructions
A detailed technical package reduces misunderstandings between the buyer and manufacturer.
Brands should avoid relying only on inspiration photographs. Images may communicate the general style, but they do not provide accurate measurements, construction details or material specifications.
Step 16: Creating the Pattern
A pattern maker converts the design into individual pieces that will form the jacket.
Pattern pieces may include:
- Front body
- Back body
- Side panels
- Sleeves
- Collar
- Lapels
- Cuffs
- Pocket welts
- Pocket bags
- Facing
- Waistband
- Lining sections
The pattern determines the jacket’s fit, balance and movement.
Pattern makers must consider that leather behaves differently from woven fabric. It may stretch in certain directions, retain needle holes and vary slightly in thickness.
The first pattern is normally developed in a base size. Once approved, it is graded into additional sizes.
Step 17: Producing the Development Sample
Before bulk manufacturing, a development sample is produced.
This sample allows the buyer and manufacturer to evaluate:
- Overall design
- Fit
- Leather selection
- Black shade
- Grain
- Thickness
- Hardware
- Stitching
- Lining
- Pocket position
- Comfort
- Measurements
- Construction
The sample may require several revisions.
For example, the buyer may request:
- A softer leather
- Shorter sleeves
- A different collar shape
- Larger pockets
- A lower-gloss finish
- Different zip colours
- A lighter lining
- Revised measurements
Changes should be documented carefully so that the next sample reflects the approved comments.
Step 18: Approving the Pre-Production Sample
Once the design and fit are finalised, a pre-production sample is made using the materials intended for bulk manufacturing.
It should include the approved:
- Leather
- Colour
- Finish
- Lining
- Thread
- Hardware
- Labels
- Measurements
- Construction
- Packaging details
The pre-production sample becomes the physical quality reference for bulk production.
Manufacturing should not begin until the buyer and factory have clearly approved this sample and all supporting specifications.
Step 19: Inspecting and Matching the Hides
Before cutting, leather hides are spread individually and inspected.
Unlike fabric, leather cannot normally be stacked in many layers and cut simultaneously because each hide has a different shape, grain and defect distribution.
Cutters identify:
- Clean areas
- Natural marks
- Stretch direction
- Grain changes
- Thickness variation
- Shade differences
- Damaged sections
Hides are grouped according to colour and texture so that all panels in one jacket appear balanced.
Poor matching may result in one sleeve looking darker or more heavily grained than the other.
Step 20: Cutting the Leather Panels
Leather panels may be cut manually with knives, mechanically using dies or digitally using automated cutting systems.
Manual Cutting
Skilled cutters position paper or board patterns on the hide and cut around them. Manual cutting provides flexibility when hides contain irregular natural features.
Die Cutting
Metal dies can cut smaller repeated components efficiently, including tabs, straps and pocket details.
Digital Cutting
Computer-controlled cutting systems use scanned hide information and digital patterns to improve accuracy and material utilisation.
Regardless of the method, cutters must consider:
- Grain direction
- Stretch
- Shade
- Thickness
- Natural marks
- Panel visibility
- Symmetry
- Material efficiency
Major panels such as the front, back and sleeves receive priority placement on the best areas of the hide.
Step 21: Marking and Bundling the Components
After cutting, every component is marked and grouped according to jacket size, colour and production order.
Marking helps operators identify:
- Matching panels
- Pocket locations
- Zip positions
- Seam alignments
- Snap placements
- Stitching references
Leather should not be marked with tools that permanently damage or discolour its visible surface.
All components belonging to one jacket are bundled together to prevent shade or grain mismatches during assembly.
Step 22: Skiving the Leather
Some leather edges must be thinned before stitching. This process is called skiving.
Skiving is commonly performed around:
- Collars
- Cuffs
- Pocket openings
- Front facings
- Folded edges
- Zips
- Hems
- Seam allowances
Reducing thickness prevents bulky seams and helps components fold cleanly.
Incorrect skiving can weaken the leather. If an edge becomes too thin, it may tear during stitching or use. Skilled operators therefore adjust the machine according to the leather type and construction.
Step 23: Preparing the Lining
The lining is cut separately using its own pattern.
Common lining materials include:
- Polyester
- Viscose
- Satin
- Cotton
- Quilted fabric
- Wool blends
- Synthetic insulation
The lining must provide sufficient ease for movement, especially around the shoulders, elbows and sleeves.
Interior pockets, care labels, brand labels and size labels may be attached during lining preparation.
A poorly cut lining can twist, pull against the leather or hang below the jacket’s hem.
Step 24: Preparing Pockets and Small Components
Before the main panels are assembled, smaller components are prepared.
These may include:
- Zip pockets
- Welt pockets
- Flap pockets
- Interior pockets
- Shoulder tabs
- Belts
- Side adjusters
- Cuff tabs
- Epaulettes
- Collar straps
Pocket openings require particular care because they experience regular pressure.
Corners may be reinforced to reduce stretching and tearing. Pocket bags should also use material strong enough for everyday use.
Step 25: Stitching the Jacket
The leather panels are assembled using industrial sewing machines designed for leather garments.
The general assembly sequence may include:
- Constructing the front panels
- Installing the pockets
- Joining the back panels
- Connecting the shoulders
- Closing the side seams
- Constructing the sleeves
- Attaching the sleeves
- Adding the collar
- Installing the front zip
- Attaching the cuffs
- Completing the hem
- Inserting the lining
The exact sequence depends on the design.
Leather sewing requires accuracy because needle holes remain visible. Operators cannot repeatedly unpick and resew seams without potentially weakening or marking the material.
Step 26: Controlling Stitch Quality
Stitching should be straight, evenly spaced and secure.
Manufacturers monitor:
- Stitch length
- Thread tension
- Seam allowance
- Needle size
- Thread strength
- Panel alignment
- Edge distance
- Reinforcement
- Seam appearance
Weak thread may break, while an unsuitable needle can damage the leather.
Stress points such as pocket corners, armholes, zip ends and belt attachments may require additional reinforcement.
The stitching style should also suit the design. A rugged biker jacket may use visible heavy topstitching, while a luxury lambskin jacket normally requires finer and more discreet stitching.
Step 27: Installing Zips and Hardware
Hardware can include:
- Main front zips
- Pocket zips
- Cuff zips
- Snaps
- Buckles
- Rivets
- Eyelets
- Adjusters
- Decorative metal components
Every item should match the approved size, colour and finish.
Hardware must suit the leather’s weight. A very heavy zip can distort thin lambskin, while lightweight hardware may appear weak on thick cowhide.
Operators must position hardware accurately and reinforce surrounding leather where necessary.
Sharp or rough metal edges should be avoided because they may damage the leather, lining or wearer’s clothing.
Step 28: Attaching the Lining
The completed lining is inserted and joined to the leather shell.
It is normally attached around:
- Front facings
- Collar
- Cuffs
- Sleeve ends
- Hem
The lining should sit smoothly without twisting, sagging or restricting movement.
The manufacturer must ensure that:
- Sleeves are correctly aligned
- Pocket bags remain flat
- Interior pockets are accessible
- Labels are positioned correctly
- The lining does not catch in zips
- Sufficient movement allowance is maintained
The final lining opening is closed neatly after construction checks are completed.
Step 29: Cleaning and Finishing the Jacket
After assembly, the jacket undergoes finishing.
This may involve:
- Removing loose threads
- Cleaning chalk or marking residue
- Wiping the leather surface
- Polishing selected areas
- Applying wax or finishing products
- Correcting minor colour differences
- Shaping the collar and lapels
- Removing light production creases
- Testing all closures
Leather must be handled carefully during finishing because excessive heat or unsuitable chemicals can damage the surface.
Any finishing product should be compatible with the approved leather type.
Step 30: Pressing and Shaping
Leather jackets cannot always be pressed using the same temperature and pressure as fabric garments.
Manufacturers may use:
- Low controlled heat
- Steam with caution
- Shaping forms
- Manual flattening
- Specialised leather presses
The goal is to improve the jacket’s shape without creating gloss marks, shrinkage, stiffness or surface damage.
Collars, lapels, cuffs and hems require particular attention because they strongly influence the jacket’s final appearance.
Step 31: In-Line Quality Control
Quality inspections should occur throughout production instead of only after completion.
In-line inspectors may check:
- Panel matching
- Stitch alignment
- Pocket position
- Zip installation
- Seam strength
- Hardware attachment
- Lining construction
- Measurements
- Workmanship
Early inspections allow the factory to correct problems before they affect large quantities.
For example, an incorrect pocket position discovered during assembly is easier to address than the same problem found after hundreds of jackets have been completed.
Step 32: Final Quality Inspection
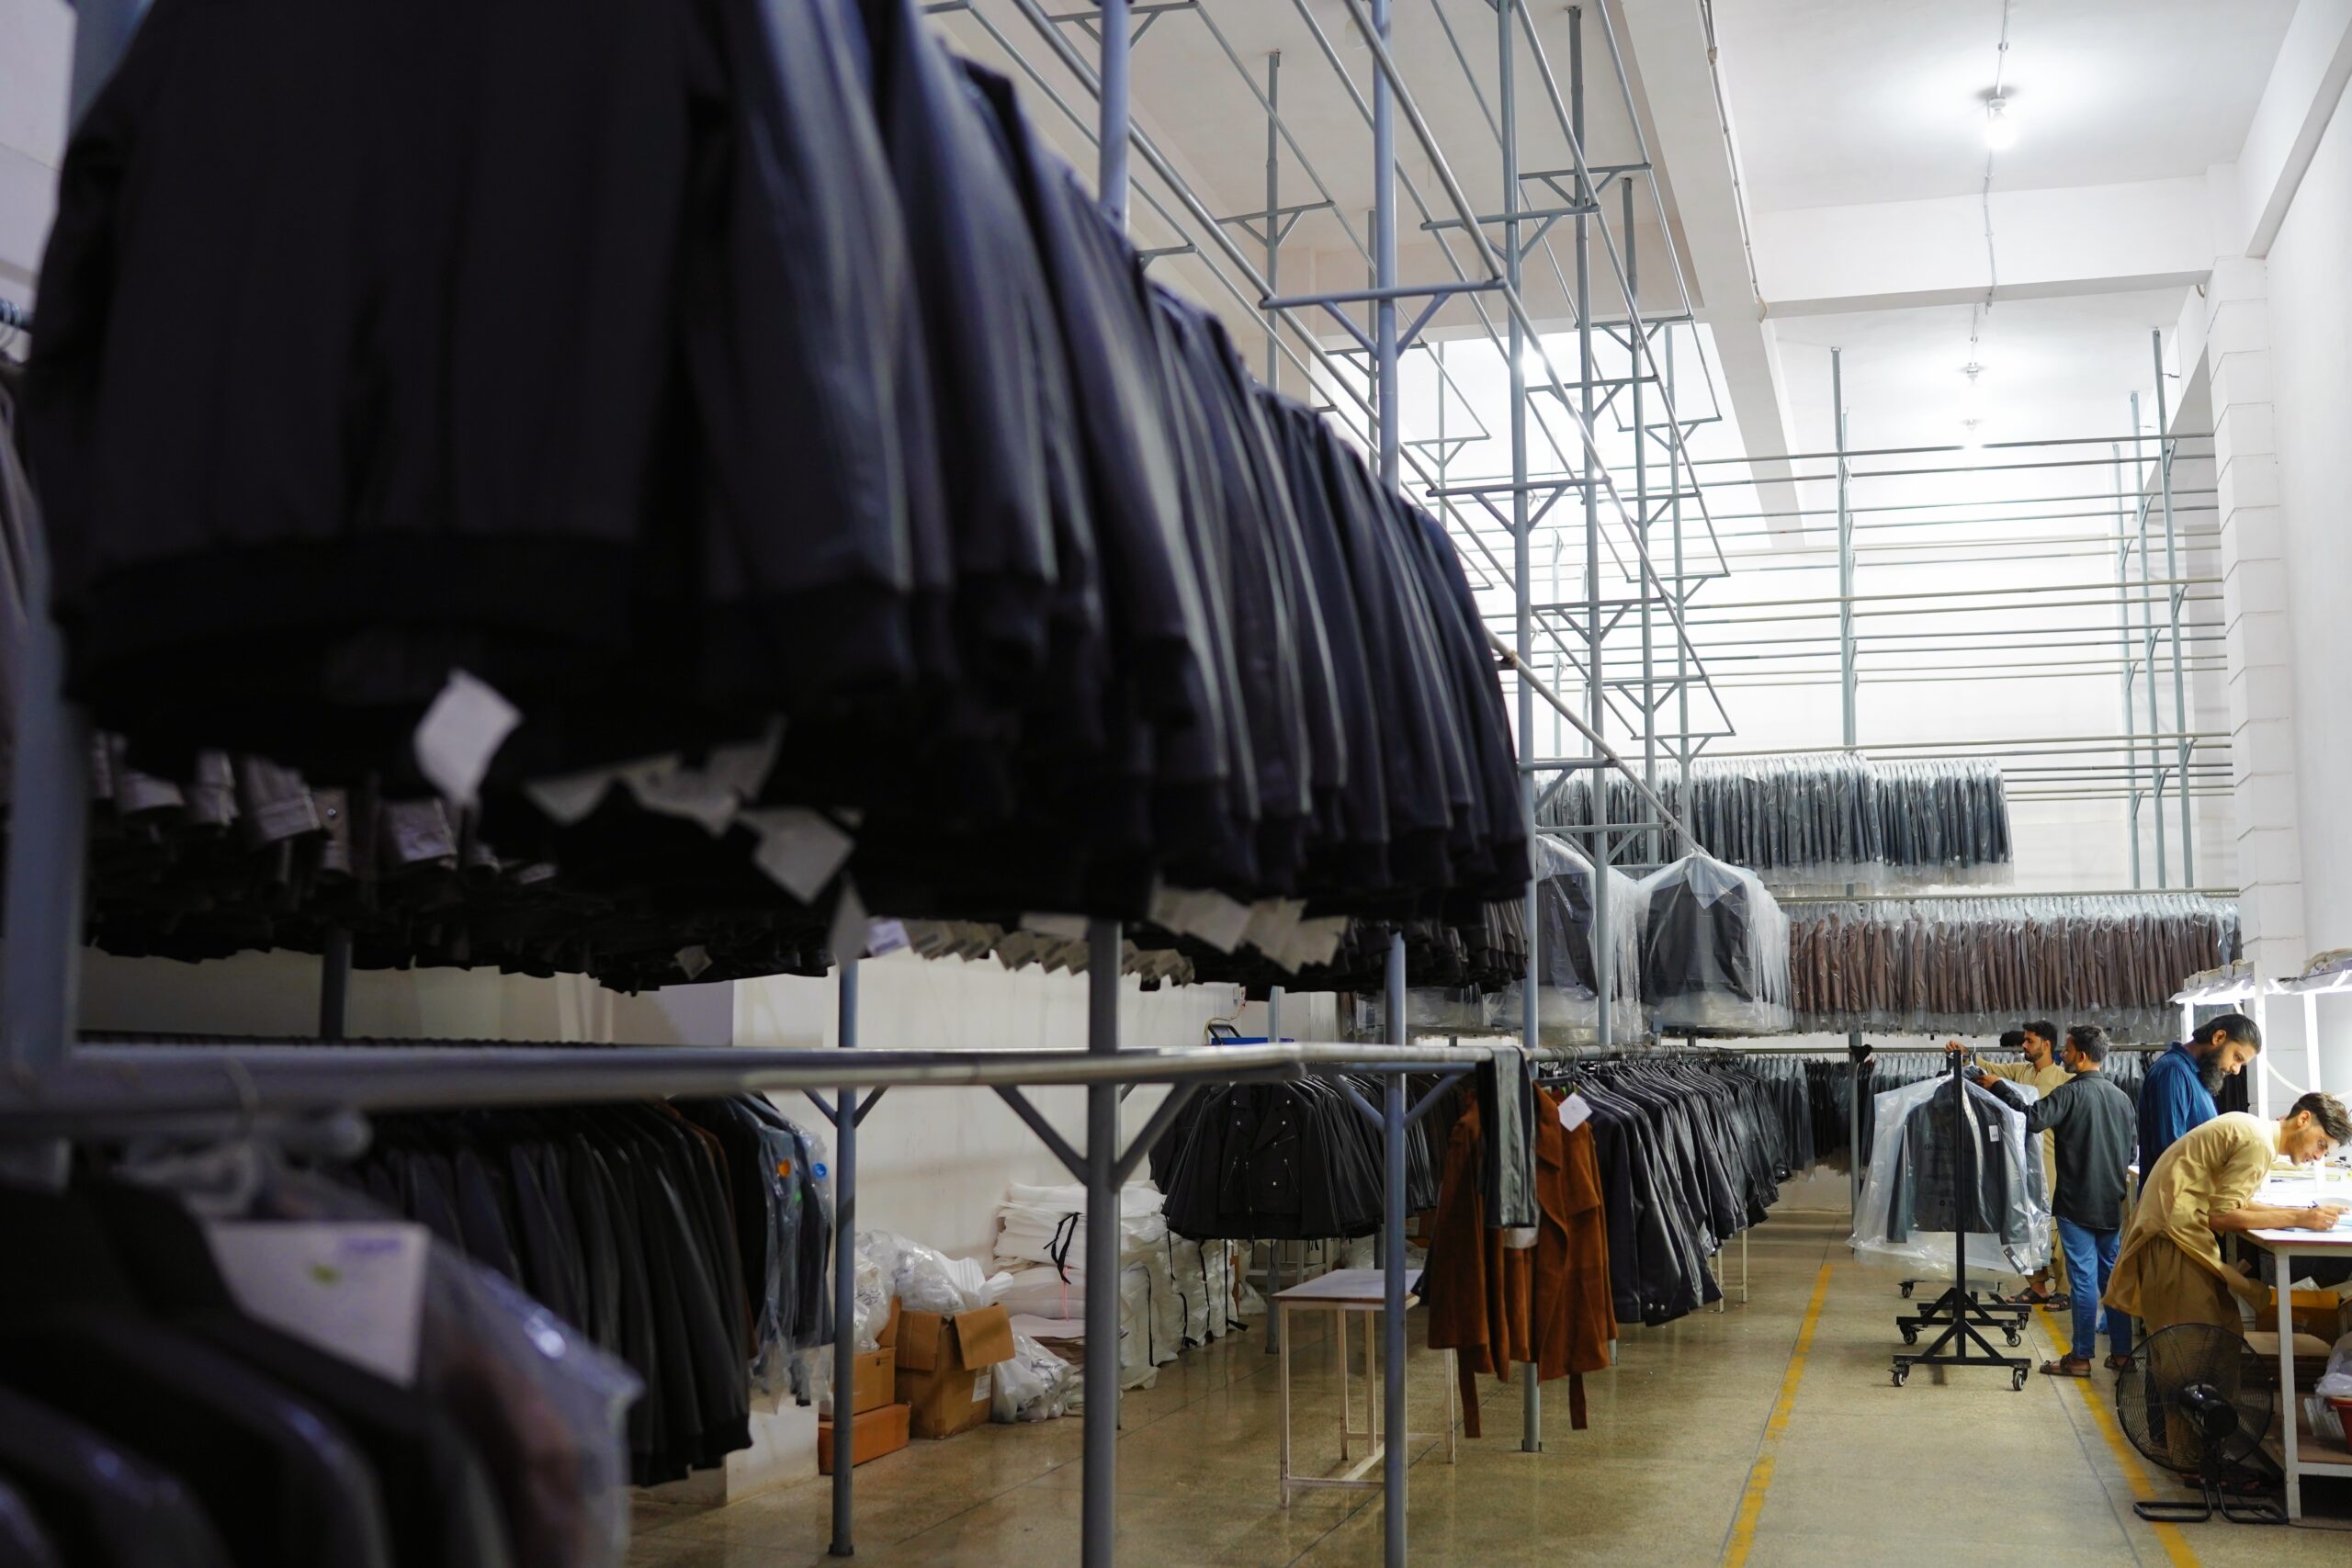
Every finished jacket should be checked against the approved sample and specifications.
Final inspection normally covers:
Leather Quality
The inspector checks the colour, grain, finish, panel matching and visible natural marks.
Measurements
The chest, body length, sleeve length, shoulder width and other points are compared with the approved measurement chart.
Workmanship
Stitching, seam alignment, pocket construction, collar shape and edge finishing are examined.
Hardware
All zips, snaps and buckles are opened and closed to confirm proper function.
Lining
The lining is checked for twisting, loose threads, open seams and incorrect attachment.
Symmetry
The sleeves, shoulders, pockets, cuffs and front panels should appear balanced.
Cleanliness
The finished jacket should be free from adhesive marks, oil, dust, loose threads and unnecessary production markings.
Defective jackets may be repaired, downgraded or rejected depending on the severity of the problem.
Step 33: Metal Detection and Compliance Checks
Depending on the buyer’s requirements, garments may pass through metal-detection equipment to identify broken needle fragments.
Brands may also require documentation covering:
- Restricted substances
- Chemical compliance
- Country-of-origin labelling
- Fibre composition
- Care instructions
- Packaging materials
- Product traceability
- Social-compliance standards
Requirements vary by market, so buyers and manufacturers should confirm them before production begins.
Step 34: Packing the Finished Jackets
After final approval, jackets are prepared for shipment.
Typical packaging may include:
- Supportive hangers
- Protective covers
- Tissue paper
- Size stickers
- Barcode labels
- Hangtags
- Individual cartons
- Master cartons
- Desiccants where appropriate
Leather should not be compressed unnecessarily because prolonged folding can create creases and distort the jacket’s shape.
Plastic packaging must be managed carefully. Long-term airtight storage may trap moisture, so packaging requirements should consider the shipping duration and climate.
How Manufacturers Maintain Consistency in Bulk Orders
Producing one attractive sample is easier than manufacturing hundreds or thousands of consistent jackets.
Reliable bulk production requires control over:
- Leather batches
- Black shade
- Grain
- Thickness
- Softness
- Cutting
- Panel matching
- Stitching
- Hardware
- Measurements
- Labels
- Packing
Manufacturers often maintain approved reference materials, including:
- Leather swatches
- Colour standards
- Hardware samples
- Thread samples
- Lining samples
- Label samples
- Packaging samples
- Pre-production jackets
These references help production and quality-control teams evaluate bulk garments against the buyer’s requirements.
For custom jacket development and bulk leather garment production, Hamid Leather Ltd works with international fashion brands, wholesalers and retailers.
How Long Does It Take to Manufacture Black Leather Jackets?
The manufacturing timeline depends on:
- Order quantity
- Leather availability
- Custom tanning requirements
- Design complexity
- Number of samples
- Hardware development
- Testing
- Factory capacity
- Buyer approval time
- Packaging requirements
Custom black leather production generally takes longer when the buyer requires a specific grain, thickness, softness or finish.
Sample development may also involve multiple revisions before bulk production can begin.
Brands should confirm realistic lead times with the manufacturer and allow enough time for material approval, sample evaluation, testing and production inspections.
Factors Affecting Manufacturing Cost
The cost of manufacturing a black leather jacket is influenced by:
- Animal source
- Leather grade
- Hide quality
- Leather thickness
- Tanning method
- Surface finish
- Cutting yield
- Design complexity
- Number of panels
- Stitching requirements
- Hardware quality
- Lining material
- Order quantity
- Labour
- Testing
- Labels
- Packaging
- Shipping
Leather is usually one of the most significant cost components.
Complex designs also require more labour. A simple café racer jacket normally takes less time to assemble than a biker jacket containing multiple zips, lapels, belts, pockets and decorative panels.
Low order quantities may have a higher cost per jacket because material sourcing, pattern development and sampling expenses are distributed across fewer units.
Importance of Leather Cutting Yield
Leather hides have irregular shapes and natural marks. Manufacturers cannot use every section for visible jacket panels.
Cutting yield refers to the percentage of the leather area that can be used effectively.
Yield is influenced by:
- Hide size
- Natural defects
- Pattern-piece size
- Jacket design
- Quality standards
- Panel-matching requirements
- Cutting skill
A jacket with large, uninterrupted panels may require cleaner hides and generate more unused material.
Experienced cutters improve material utilisation while maintaining the required visual quality.
Sustainable and Responsible Manufacturing Considerations
Leather jacket manufacturing can involve environmental and social impacts at different stages.
Responsible production may include:
- Traceable raw materials
- Controlled chemical use
- Wastewater treatment
- Water recycling
- Energy efficiency
- Restricted-substance management
- Responsible disposal of solid waste
- Safe working conditions
- Material optimisation
- Durable product design
- Repairable construction
- Reduced packaging
Brands should request evidence to support environmental claims.
Terms such as “eco-friendly,” “green” and “sustainable” should not be used without clear information regarding sourcing, tanning, chemicals, energy, waste and product durability.
A well-constructed jacket designed for long-term use may reduce the need for frequent replacement, but durability alone does not remove the need for responsible manufacturing controls.
Common Manufacturing Defects
Problems that may occur during leather jacket production include:
- Uneven black colour
- Poor panel matching
- Surface scratches
- Finish cracking
- Strong colour transfer
- Crooked stitching
- Skipped stitches
- Loose threads
- Visible needle holes
- Weak pocket corners
- Misaligned zips
- Uneven sleeves
- Twisted lining
- Incorrect measurements
- Poor collar shape
- Loose snaps
- Sharp hardware
- Adhesive marks
- Packaging creases
Many defects can be prevented through accurate specifications, approved samples, trained workers and regular inspections.
What B2B Buyers Should Provide to a Manufacturer
Brands and wholesale buyers should provide a detailed technical package containing:
- Design drawings
- Reference photographs
- Measurement chart
- Size range
- Fit description
- Leather type
- Leather grade
- Thickness range
- Black colour standard
- Surface finish
- Lining composition
- Hardware specifications
- Thread requirements
- Label details
- Packaging instructions
- Testing standards
- Target quantity
- Delivery schedule
General instructions such as “make a premium black leather jacket” are not specific enough for reliable production.
The buyer and manufacturer should agree on measurable standards before materials are purchased and bulk cutting begins.
Frequently Asked Questions
How are black leather jackets manufactured?
They are manufactured by tanning and dyeing animal hides, developing patterns, cutting individual leather panels, stitching the components, installing the lining and hardware, finishing the garment and conducting quality inspections.
Which leather is most commonly used?
Cowhide, sheepskin, lambskin and goatskin are among the most commonly used leathers. The best choice depends on the required softness, strength, weight and jacket style.
Is the leather dyed before or after cutting?
Leather is generally dyed and finished at the tannery before it is cut into jacket panels.
How is leather made black?
Dyes are introduced into the leather during drum processing. Additional pigments, waxes or surface coatings may then be applied to achieve the required black shade and finish.
Are leather jackets stitched by hand?
Most leather jackets are assembled using specialised industrial sewing machines. Some details and finishing work may be completed manually.
Why must leather panels be matched?
Natural hides vary in grain, shade, thickness and texture. Matching helps ensure that neighbouring panels look balanced and behave consistently.
Why are leather jackets expensive to manufacture?
Leather requires careful tanning, grading, cutting and panel matching. Material cost, skilled labour, hardware, lining, testing and quality control also contribute to the price.
Can several leather layers be cut together?
Leather is usually cut one hide at a time because every hide has a unique shape and natural characteristics.
What is skiving?
Skiving is the process of thinning selected leather edges to reduce bulk and create cleaner seams, folds and component attachments.
What is a pre-production sample?
It is a complete jacket made using the intended bulk materials and approved construction. It serves as the reference before mass production begins.
How is jacket quality checked?
Inspectors examine the leather, measurements, stitching, symmetry, lining, zips, hardware, cleanliness and overall workmanship.
How long does production take?
The timeline varies according to leather availability, order size, design complexity, sample approvals, testing and factory capacity.
Can brands order custom black leather jackets?
Yes. Manufacturers can develop custom patterns, leather finishes, hardware, linings, labels and packaging according to the buyer’s specifications.
Why does black leather sometimes vary in shade?
Natural hides absorb dyes and finishes differently. Careful batch control, hide grouping and panel matching help reduce visible variation.
Is full-grain leather used for jacket manufacturing?
Yes. Full-grain cowhide, goatskin, sheepskin and other hides can be used for premium jackets where natural grain, durability and long-term character are important.
Final Thoughts
Black leather jacket manufacturing is a complex process that begins long before the first panels are stitched together.
Raw hides must be preserved, cleaned, tanned, dyed, softened and finished to create leather suitable for garments. The finished hides are then graded and matched according to their black shade, grain, thickness and flexibility.
Pattern makers translate the design into accurate components, while skilled cutters position each piece around the hide’s natural characteristics. Sewing operators assemble the jacket carefully because leather retains permanent needle holes and allows little room for repeated corrections.
Zips, snaps, lining, pockets and labels must all be attached according to the approved specifications. In-line and final inspections then confirm that the finished jackets meet the required standards for measurements, appearance, workmanship and function.
For fashion brands and wholesale buyers, successful production depends on detailed specifications, physical material approval, complete samples and consistent communication with the manufacturer.
Ultimately, a well-manufactured black leather jacket combines suitable leather, controlled tanning, accurate pattern cutting, skilled stitching, reliable components and thorough quality control. When every stage is managed correctly, the final jacket can provide comfort, durability and long-term value.